WordPress on VPS Without Cpanel or FTP – Quick Startup Guide
Install WordPress on VPS
In this tutorial you will learn how to Install WordPress on VPS without any control panel like (cPanel, Plesk, Kloxo, etc) also without using FTP client or phpMyAdmin. Just the command line will do a perfect job. By following these steps you’ll get Rock-solid WordPress site which is secure Enough and has high availability performance. Whatever traffic you have this machine can carry easily massive traffic. This tutorial is divided into two parts,the first one is LEMP stack setup and the other is WordPress setup.
- Duration estimated time: 5 minutes or less
- Tutorial level: Beginners
Install Requirements:
- A KVM VPS with root access (Will apply to ubuntu 14.04)
- Domain name pointed at your VPS (yourdomain.com)
- SSH Client Software like PuTTY or Bitvise for windows (will use Bitvise)
LEMP stack setup (Nginx, MySQL, PHP)
To be able to Install WordPress on VPS you must first have Linux LEMP stack software installed on your machine to serve the dynamic content of WordPress.
Login to your VPS with info sent to you in New Account Information email.
Remove Apache Web Server:
If Apache Web Server installed by default in your VPS just remove it, as we will use Nginx instead (if no neglect this step)
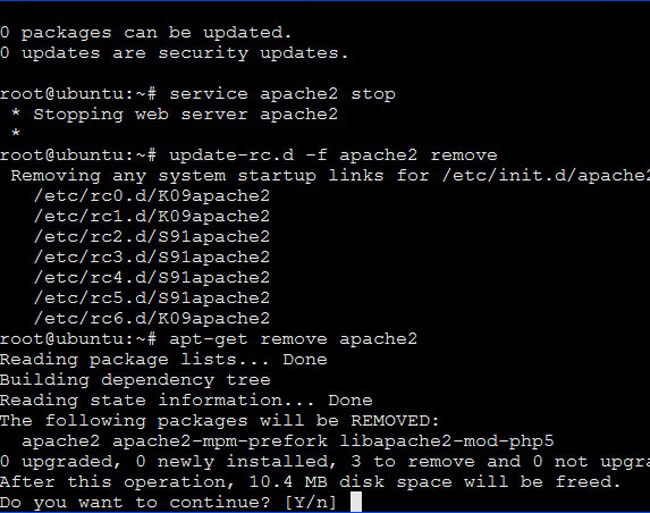
service apache2 stop
update-rc.d -f apache2 remove
apt-get remove apache2
A warning message will appear, type [Y] and press enter.
Install Nginx Web Server
apt-get update
apt-get install nginx
service nginx start
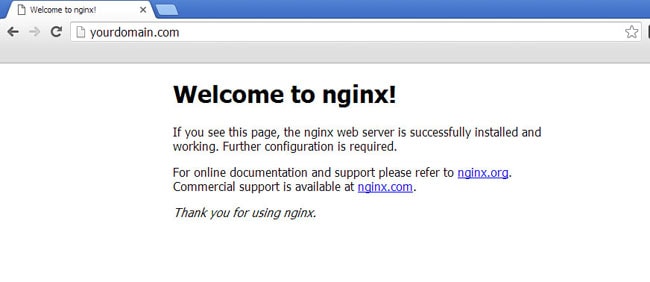
Now to check that Nginx working, just type your IP (or yourdomain) address in browser you will see Welcome message of Nginx
Install MySQL (to Store Site Data)
apt-get install mysql-server mysql-client
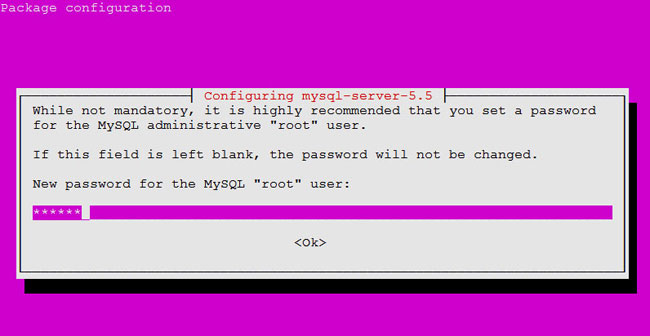
A prompt window will open to choose a password for your database insert the password chosen and press enter
mysql_install_db
/us/bin/mysql_secure_installation
Then you will asked for some options just choose below:
Change the root password? [Y/n] Choose N
Remove anonymous users? [Y/n] Choose Y
Disallow root login remotely? [Y/n] Choose Y
Remove test database and access to it? [Y/n] Choose Y
Reload privilege tables now? [Y/n] Choose Y
finally a message will appear to inform you that you’re done
All done! If you’ve completed all of the above steps, your MySQL
installation should now be secure. Thanks for using MySQL!
Install PHP (to serve dynamic content)
Install PHP (you may need extra libraries required to run WordPress perfect you can add later whatever you want)
apt-get install php-fpm php-mysql
Now we are going yo modify configuration of php.ini and www files in path /etc/php5/fpm/ (in case of ubuntu 14.04) using nano*
nano /etc/php5/fpm/php.ini
Change ;cgi.fix_pathinfo=1 to cgi.fix_pathinfo=0
nano /etc/php5/fpm/pool.d/www.conf
Change listen = /var/run/php5-fpm.sock to listen = 127.0.0.1:9000
restart php to make changes take effect
service php5-fpm restart
in this step we have finished LEMP stack software and your machine is able to run WordPress or any other application
WordPress setup
A- Build file structure
build file structure to host your WordPress files then bind with nginx
mkdir -p /var/www/yourdomain.com/public_html
cp /etc/nginx/sites-available/default /etc/nginx/sites-available/yourdomain.com
ln -s /etc/nginx/sites-available/yourdomain.com /etc/nginx/sites-enabled/yourdomain.com
Navigate to public_html folder to download nginx
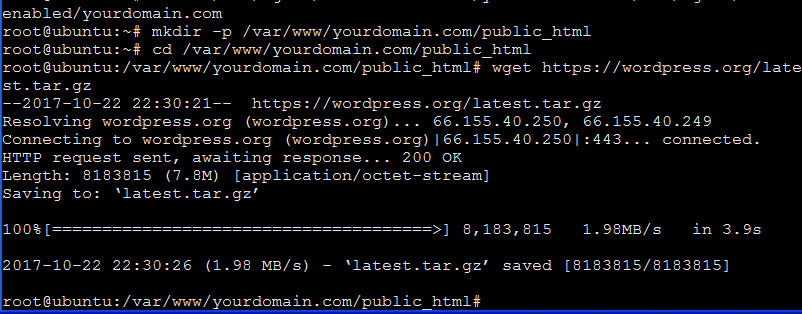
cd /var/www/yourdomain.com/public_html
then download it via wget command
wget https://wordpress.org/latest.tar.gz
then extract it
tar xvzf latest.tar.gz
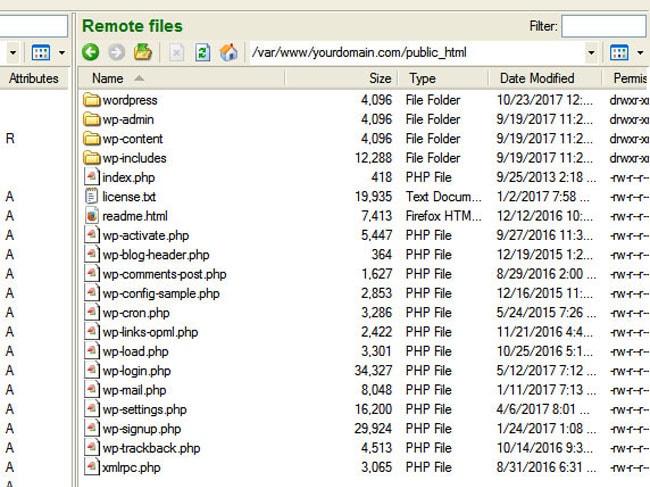
this will create a folder called wordpress navigate to it and move all files one level up to place in publi_html directory
cd /var/www/yourdomain.com/public_html/wordpress
mv -v /var/www/yourdomain.com/public_html/wordpress/* /var/www/yourdomain.com/public_html/
finally your files musst be as in image
B-create WordPress database
Below we are going to install the database for WordPress site without phpMyAdmin only with Command Line (More secure!?)*
Login in to MySQL by typing command bellow and create a new data base (copy and paste line by line and press enter for each):
mysql -u root -p

CREATE DATABASE wordpresss;

CREATE USER wordpresss_user@localhost;

GRANT ALL PRIVILEGES ON wordpresss.* TOwordpresss_user@localhost IDENTIFIED BY 'wordpresss_pass';

FLUSH PRIVILEGES;

quit;
Change values above of “wordpresss | wordpresss_user | wordpresss_pass” with your own and record them away, as it is the values of “Database Name | Username | Password” you’ll asked to insert in installing WordPress after a while.
C-Modify vhost default values
nano /etc/nginx/sites-available/yourdomain.com
in serer block change default red values with green values
root /usr/share/nginx/html; with root /var/www/yourdomain.com/public_html;
index index.html index.htm; with index index.php index.html index.htm;
server_name localhost; with server_name yourdomain.com;
add php configuration by inserting following lines at the end of the file:
location ~ \.php$ {
try_files $uri =404;
fastcgi_pass 127.0.0.1:9000;
fastcgi_index index.php;
fastcgi_param SCRIPT_FILENAME $document_root$fastcgi_script_name;
include fastcgi_params;
}
Then restart
service nginx restart && service php5-fpm restart
once nginx&php restarted just type your domain in browser you’ll redirect to WordPress installation wizard
http://yourdomain.com/wp-admin/setup-config.php
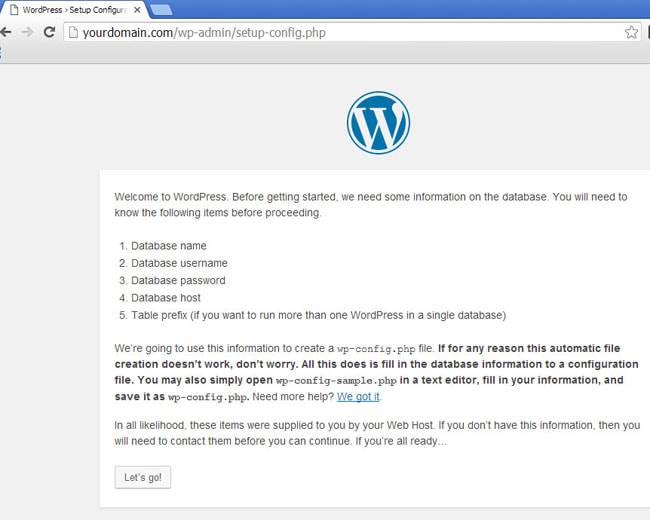
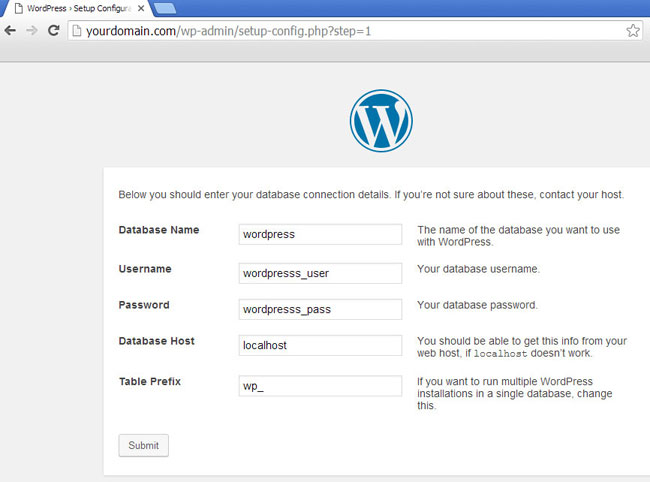
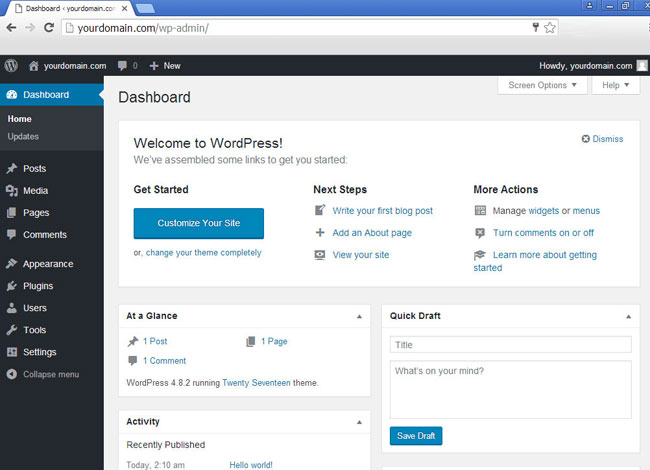
Finish steps you will asked again to insert username, password and Email but this time for WordPress Admin, finally you’ll login to WordPress admin panel as in figure:
That’s all, Enjoy! ?
By the of this tutorial you now know how to Install WordPress on VPS perfectly, but that is not all, every part of the tutorial need more effort to build your knowledge and develop your skills in vps management. This was just a quick startup guide so you can start your business up fast. Weather you are an affiliate marketer, webmaster, woo-commerce trader or even a business owner you will need WordPress. The power of Nginx web server is that it gives you magnificent availability even if you have huge number of visits daily. Using a VPS without a management panel increases your security; as these panels are an easy target to hacking attempts.
The main purpose of this exercise is to put you at the beginning of the way to learn and apply Linux commands to create the first WordPress site safe and highly efficient This exercise is just a quick start but enough to start in the world of server management
