How To Build A Beautiful Website Using SitePad’s Website Builder
Most of our customers here at VisualWebTechnologies choose to use WordPress.
However, we still get a fair amount of requests asking our sales team about the type of website builders we offer.
For those unfamiliar a website builder is an application that allows you to drag and drop elements as well as the ability to point and click to edit your website in real-time.
To satisfy this need, we’ve integrated directly with SitePad.
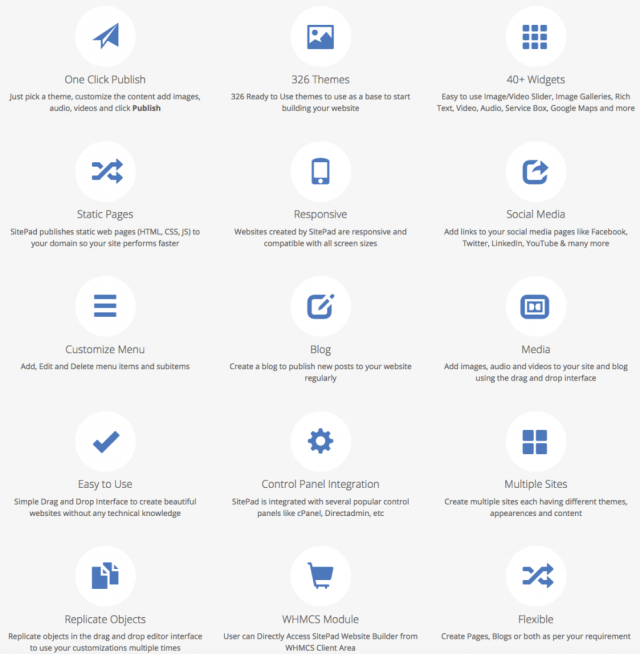
SitePad Features
The SitePad builder is already integrated into every cPanel account at VisualWebTechnologies.
How To Access SitePad
To access, you need to login to cPanel and then click on Softaculous Apps Installer:
Once inside of Softaculous you can click on SitePad Website Builder on the left menu:

Which will bring you to the application main page where you can Get Started or View Plans:

Get Started – This provides you instant access to their free plan. It includes 15 themes, 1 website, 3 pages per site, 3 blog posts per site, and 500MB of space. Great for websites just getting started of if you just want to demo the platform to see if it’s for you.
Step 2: Install SitePad on a Domain
Scroll down until you see the SitePad website builder themes section. When you see it, scroll through the themes and pick the one you want and click on it.
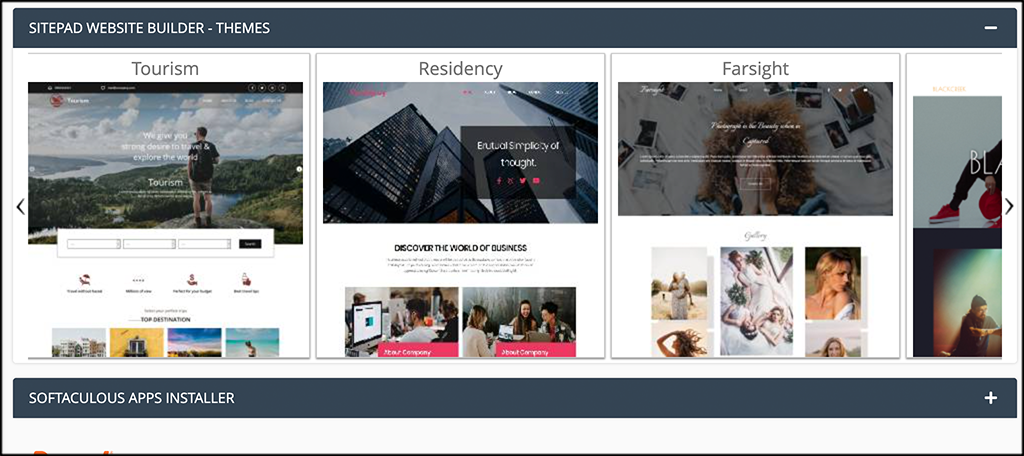
When you choose a theme, a full-page section will open up where you can attach your domain name and configure everything. Input the domain you want to use in this section, even if it’s a subdomain.
Click on the “Proceed With Install” button at the bottom of the page.

Step 3: Creating Your Website
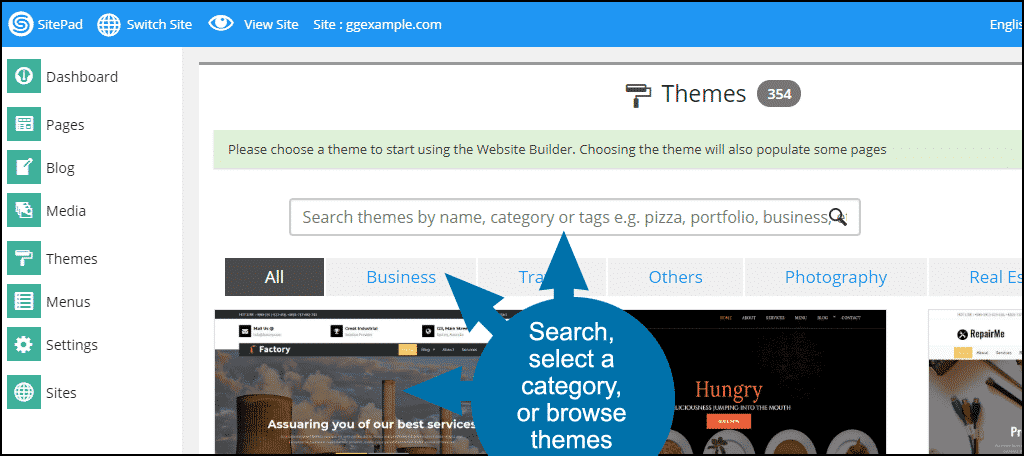
The first step is to select a theme (if you want to switch it from the one you chose earlier). That can be done via search, choosing a category, or scrolling to browse all available themes.
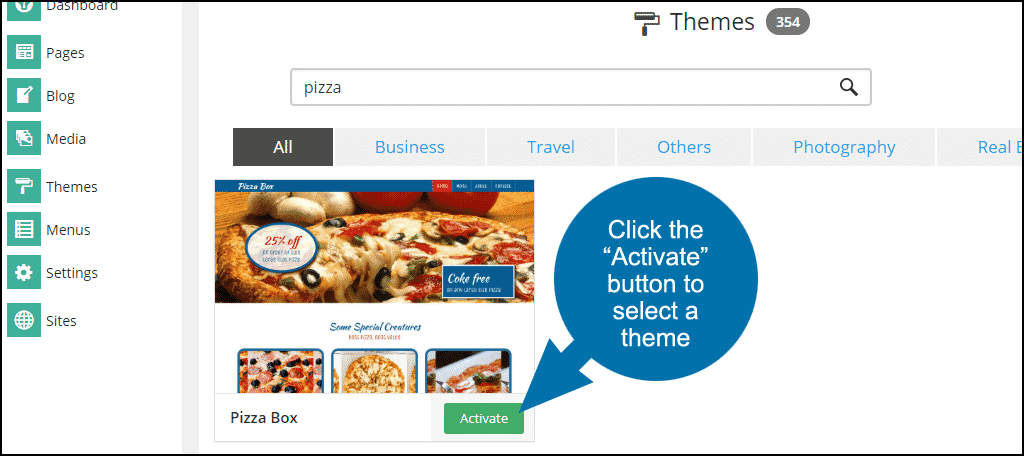
Once you have decided on a theme, click the “Activate” button for the theme.
Step 4: Edit Your Website
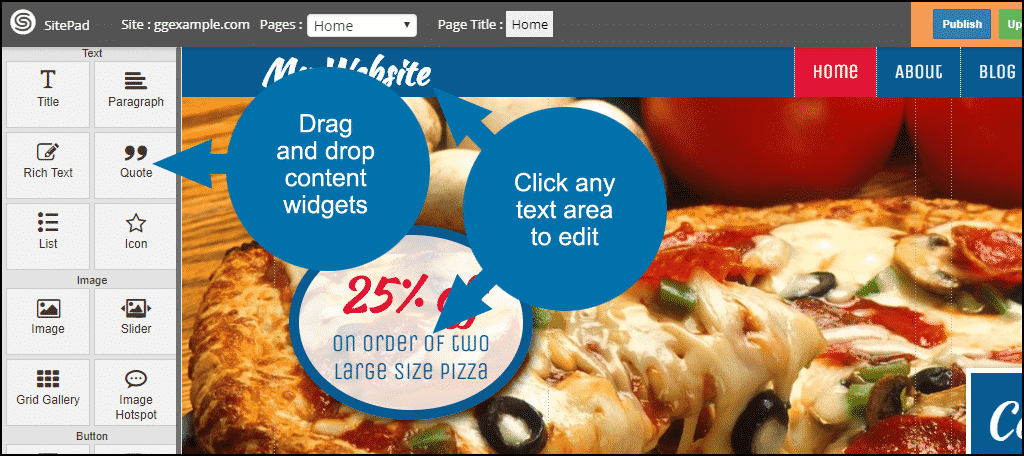
After installing all of the necessary files, you’ll be taken to the editing page for the home page of the site. Click any text to edit it, or use the drag-and-drop widgets in the left side navigation.
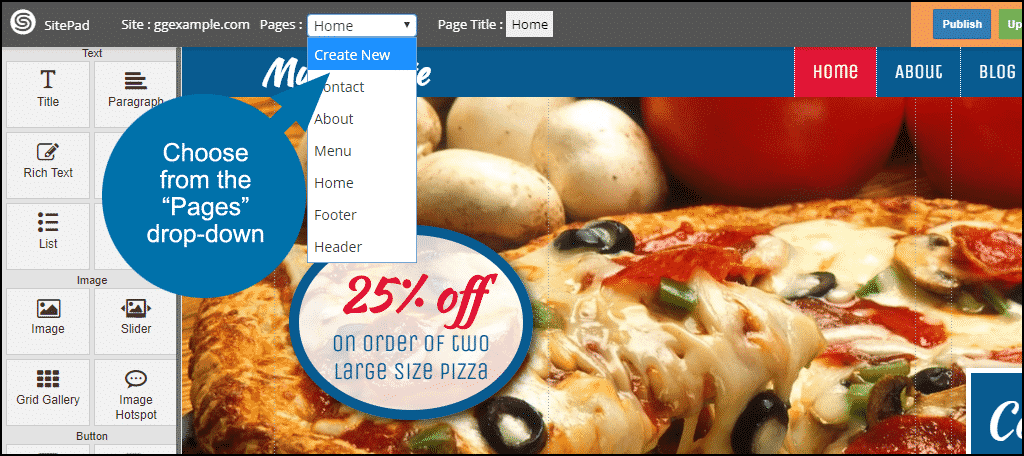
To change which page you’re editing, or to create a new page, choose from the “Pages” drop-down.
Step 5: Save Changes to Your Website
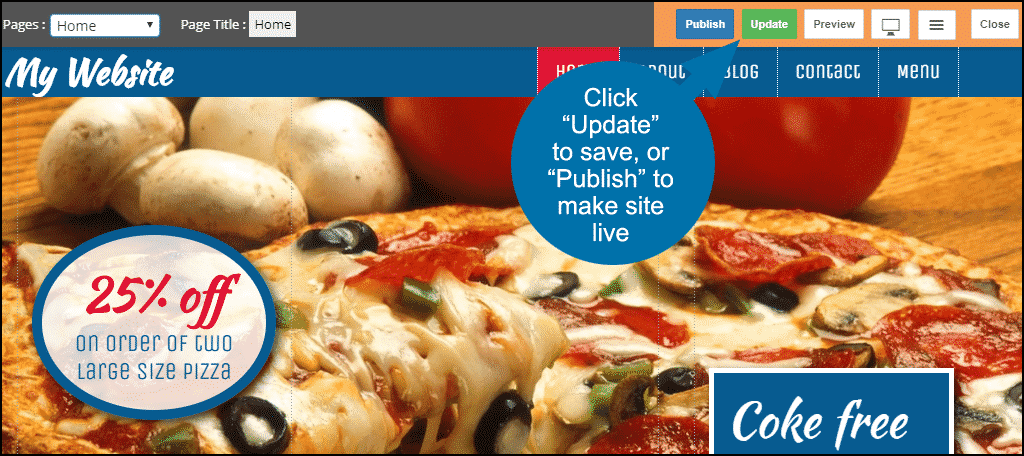
When you have finished editing, click the “Update” button to save your work. When you are ready to make the page (or the site) live, click the “Publish” button.
Step 6: Maintaining Your Website
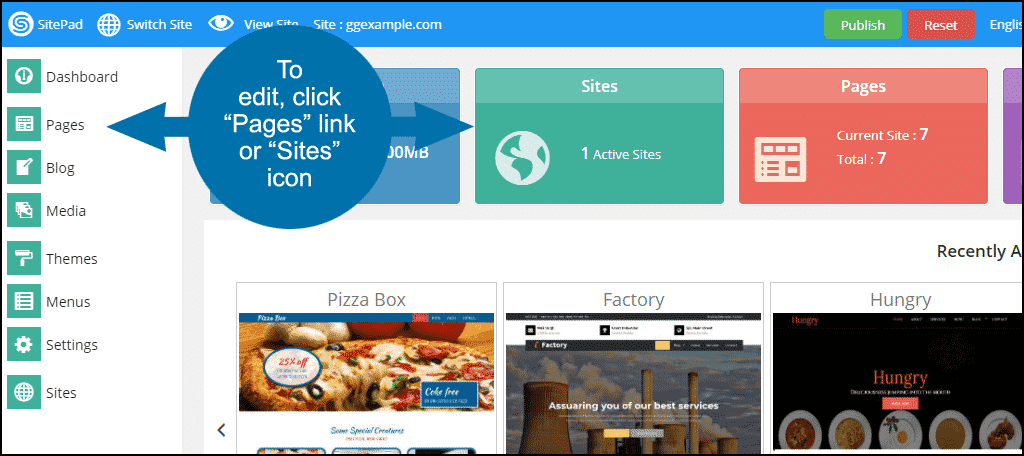
When you need to come back to your site in the future, access it by logging in to cPanel, as described above, then in the “Software” section, click the “SitePad Website Builder” link or icon.
When the SitePad page loads, edit your site by clicking the “Pages” link or the “Sites” icon.
There’s More to See and Do
This has been a very general overview of getting started with SitePad. For further details on what it can do for you, consult their documentation. I mentioned the limitations inherent in site builders earlier, but that doesn’t mean they can’t create attractive useful sites.
Your SitePad site can include a blog, image, and video galleries, menus for navigation – you aren’t limited to a page or two. Advanced configuration, like connecting to a database server, has to be done manually. But as a tool to build a base, it can’t be beaten.
Remember, if you have multiple domains and you want to make sure that SitePad works on the correct one, then make sure that the domain you want is attached properly in the site details configuration portion of the set up above.
Final Thoughts
Installing SitePad and setting up a website using this editor is not overly difficult. You can simply follow the steps above and you will have your first SiterPad website up and running in no time at all.
It’s important to read the text at the bottom that states you’ll still be using VisualWebTechnologies web hosting, the SitePage Website Builder simply builds your website and uploads it to your account automatically.
This allows you the ability to still take full advantage of our features such as high-speed Cloud Hosting with Nginx, free SSL, and Cloudflare.

